1. 라즈베리파이 피코 블루투스 RC카 구동영상
2. 시스템 구성 확인 : 피코 내장 블루투스 사용이 특징
제작과정
1단계. 라즈베리파이 피코 블루트스 펌웨어 설치
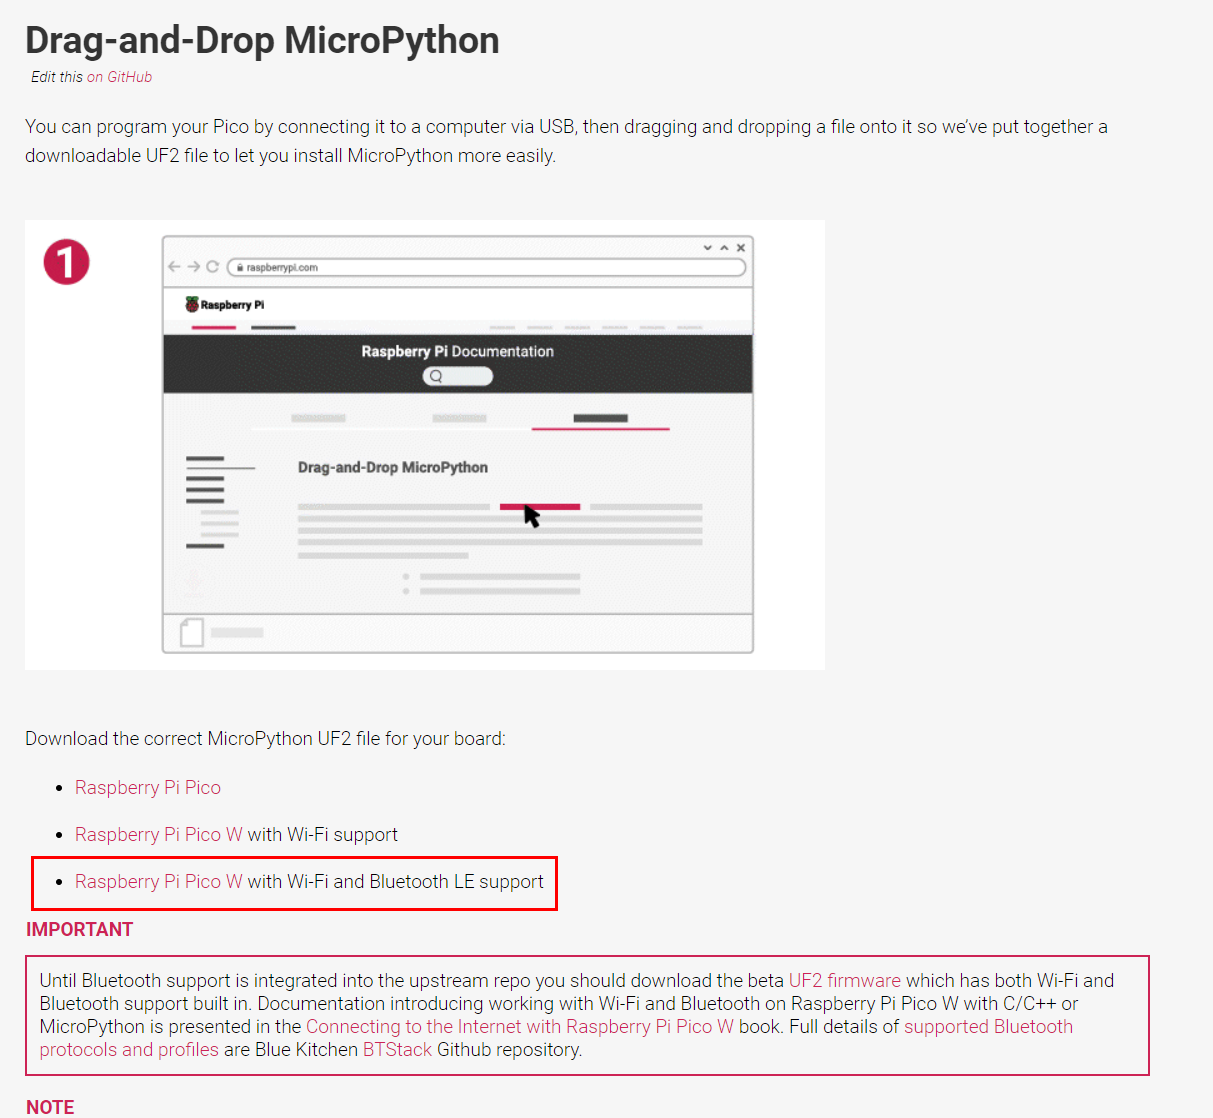
블루투스 전용 펌웨어 설치( 출시된지 얼마 안되었음 ㅎ)
https://www.raspberrypi.com/documentation/microcontrollers/micropython.html
Raspberry Pi Documentation - MicroPython
The official documentation for Raspberry Pi computers and microcontrollers
www.raspberrypi.com
기본 개발환경 방법 아래 링크 참조.
https://diyver.tistory.com/189
라즈베리파이 피코(Raspberry pi PICO) 개발환경 세팅하기 micropython
라즈베리파이 피코는 아두이노처럼 각종 센서를 읽고 구동기를 작동시키는 마이크로컨트롤러이다. 코딩은 micropython 과 C/C++ 로 할 수 있다고 한다. 공식 홈페이지에 방문해서 알아보자. https://www
diyver.tistory.com
2단계. 프로그래밍 코드 업로드
코드 원본 출처 :
https://electrocredible.com/raspberry-pi-pico-w-bluetooth-ble-micropython/
Raspberry Pi Pico W Bluetooth(BLE) using MicroPython | Point-to-Point Communication
Learn how to use the onboard Bluetooth on Raspberry Pi Pico W using MicroPython. Read pushbutton status and control an LED with Android app.
electrocredible.com
메인코드 확인
# Import necessary modules
from machine import Pin
import bluetooth
from ble_simple_peripheral import BLESimplePeripheral
import utime

# Create a Bluetooth Low Energy (BLE) object
ble = bluetooth.BLE()

# Create an instance of the BLESimplePeripheral class with the BLE object
sp = BLESimplePeripheral(ble)

# Create a Pin object for the onboard LED, configure it as an output
led = Pin("LED", Pin.OUT)

# Initialize the LED state to 0 (off)
led.value(1) # 최초 led 켜짐으로 연결 확인
led_state = 0
m1 = Pin(1, Pin.OUT)
m2 = Pin(2, Pin.OUT)
m3 = Pin(3, Pin.OUT)
m4 = Pin(4, Pin.OUT)

en1 = Pin(0, Pin.OUT)
en2 = Pin(5, Pin.OUT)
en1(1)  # motor 1 enable, set value 0 to disable
en2(1)  # motor 2 enable, set value 0 to disable

# Define a callback function to handle received data
def on_rx(data):
    print("Data received: ", data)  # Print the received data
    global led_state  # Access the global variable led_state
    if data == b'led\r\n':  # Check if the received data is "toggle"
        led.value(not led_state)  # Toggle the LED state (on/off)
        led_state = 1 - led_state  # Update the LED state
    elif data == b'go\r\n':
        m1(1)
        m2(0)
        m3(0)
        m4(1)
        utime.sleep(1)
    elif data == b'stop\r\n':
        m1(0)
        m2(0)
        m3(0)
        m4(0)
        utime.sleep(1)
    elif data == b'right\r\n':
        m1(1)
        m2(0)
        m3(0)
        m4(0)
        utime.sleep(1)
    elif data == b'left\r\n':
        m1(0)
        m2(0)
        m3(0)
        m4(1)
        utime.sleep(1)
    elif data == b'back\r\n':
        m1(0)
        m2(1)
        m3(1)
        m4(0)
        utime.sleep(1)

# Start an infinite loop
while True:
    if sp.is_connected():  # Check if a BLE connection is established
        sp.on_write(on_rx)  # Set the callback function for data reception
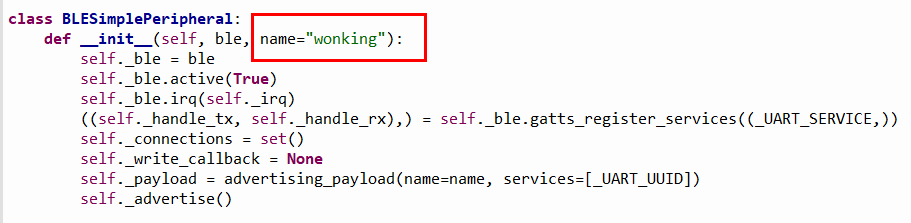
블루투스 이름 섞이지 않게 이름 변경 추천
피코에 코드 저장. 후 main.py 실행
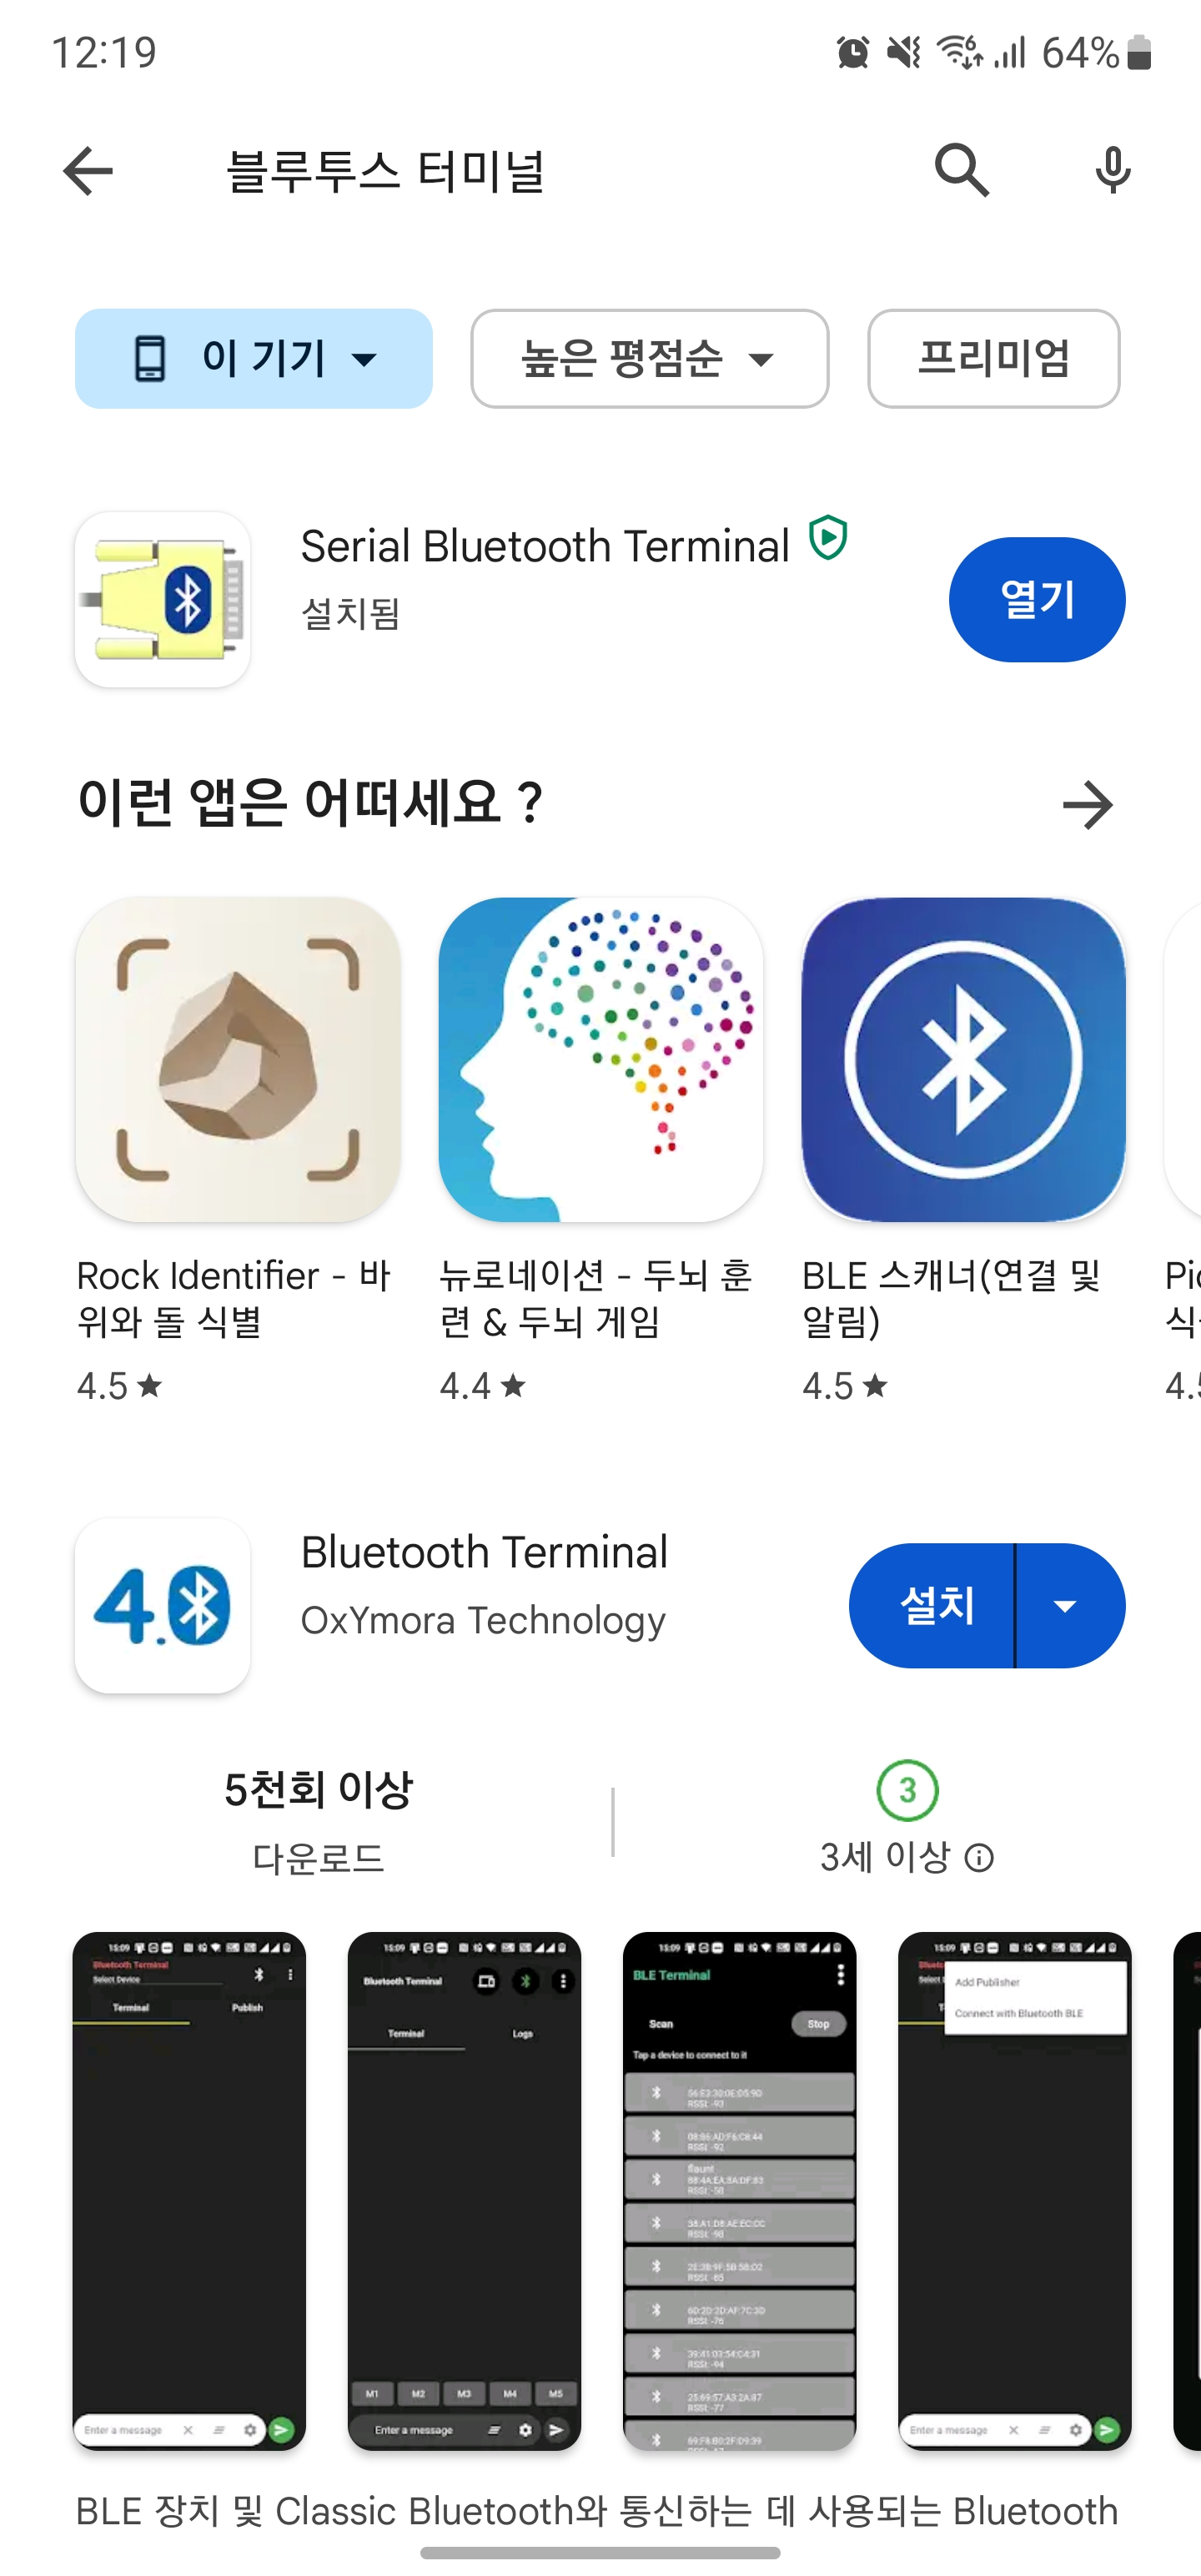
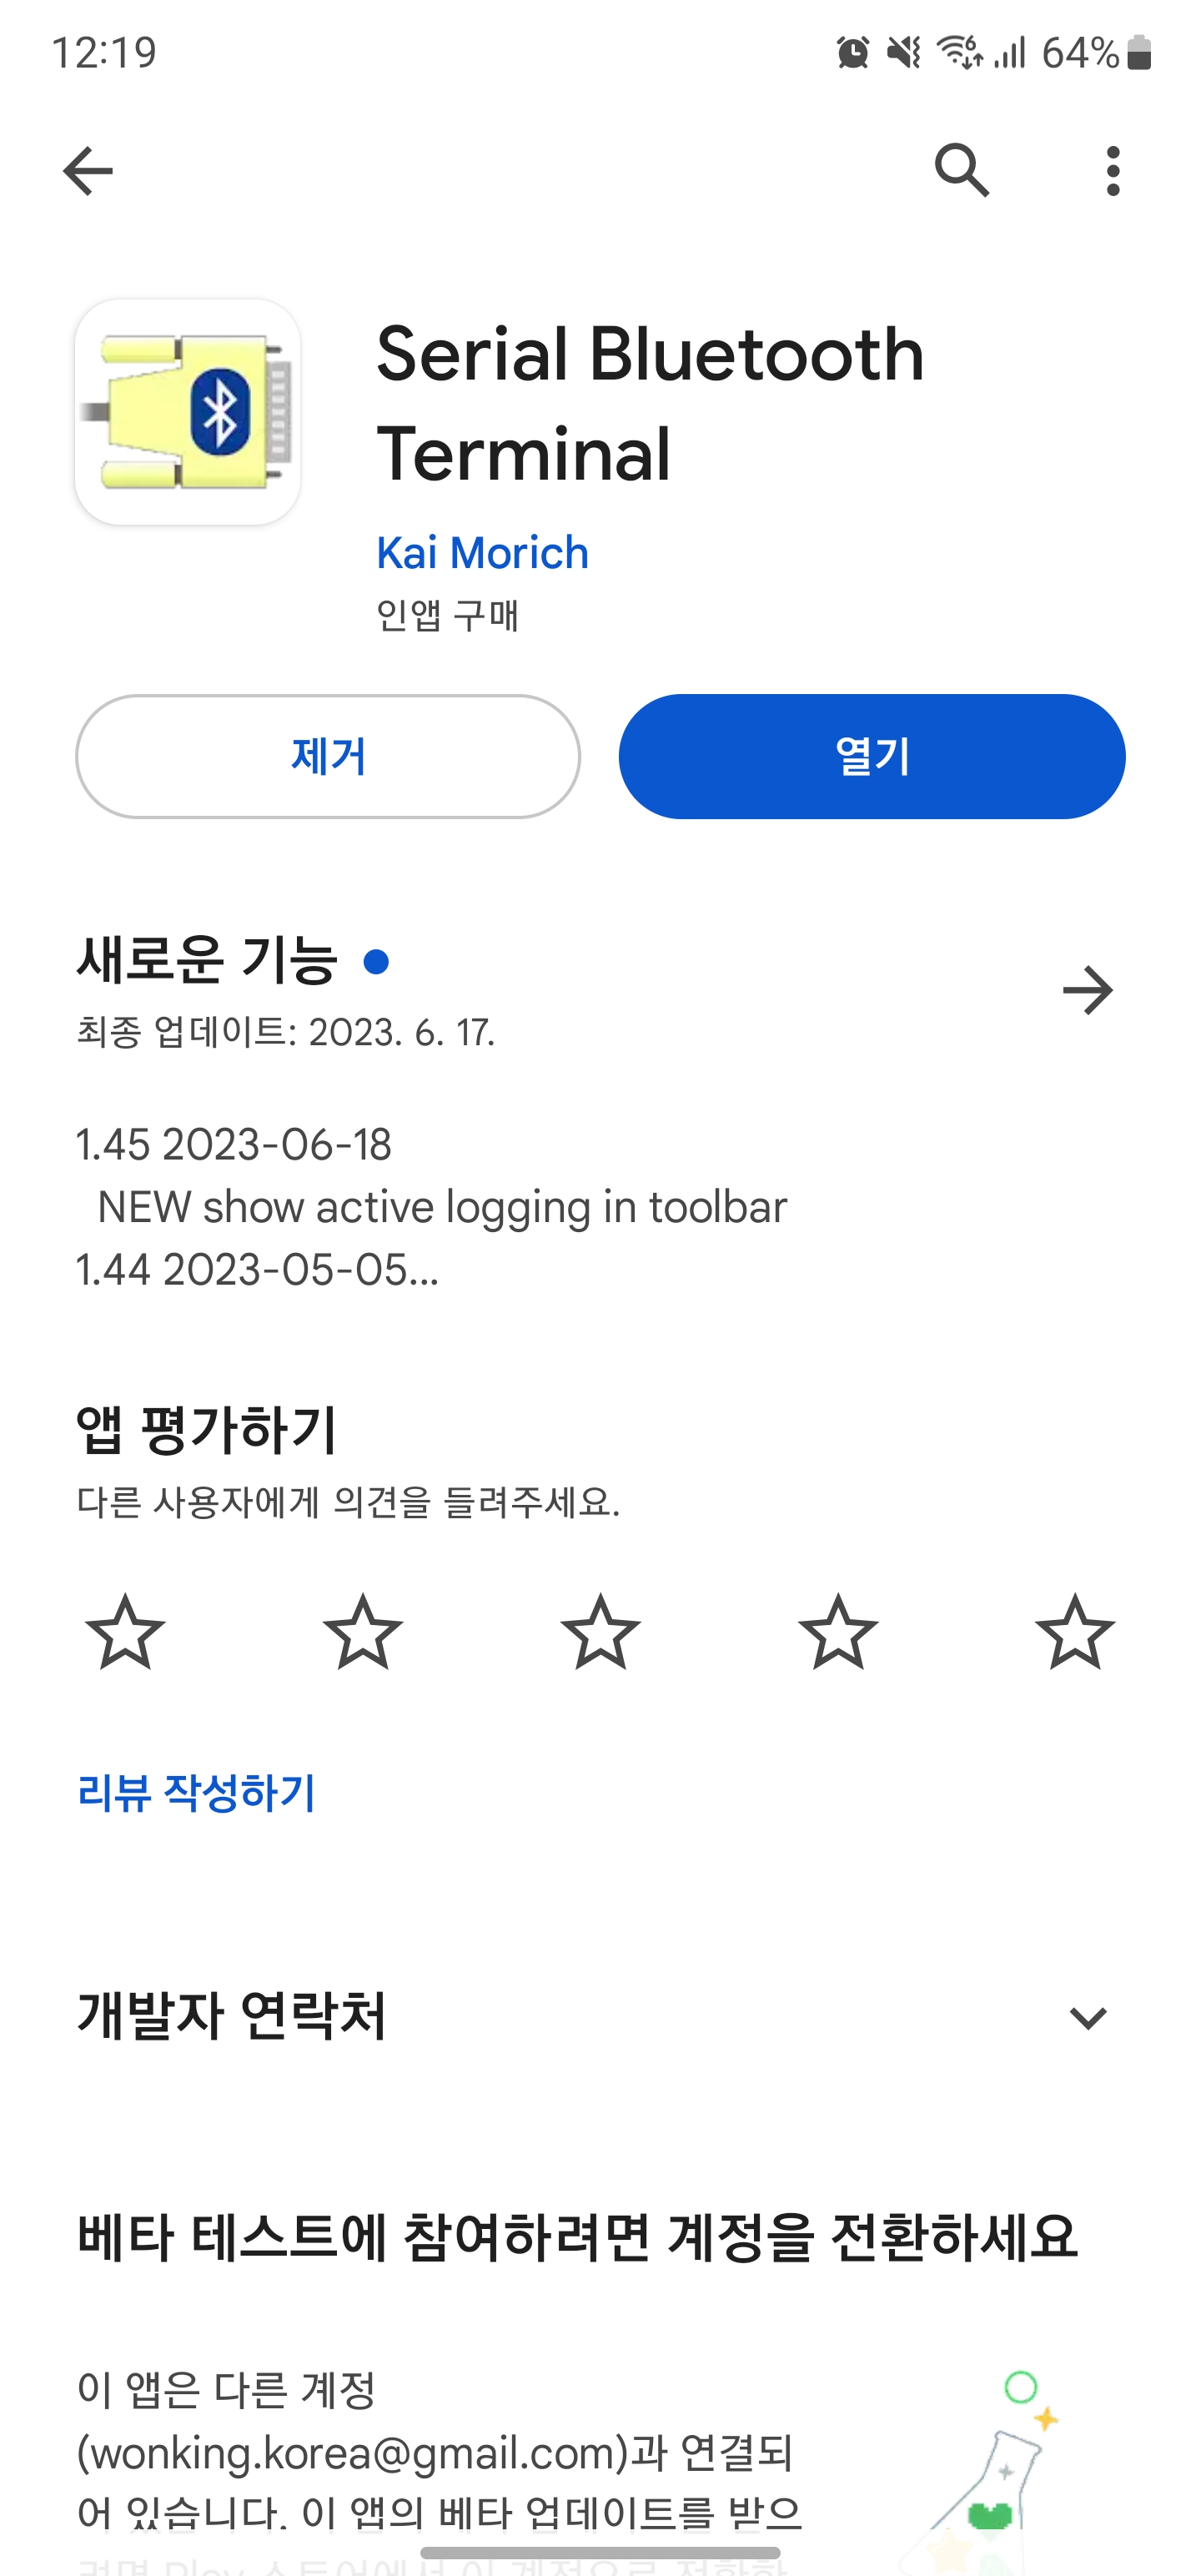
3단계. 블루투스 어플과 연동
블루투스 터미널 검색 후 설치(안드로이드)
아이폰도 비슷한 어플 설피하면 연동 가능
메뉴 확인
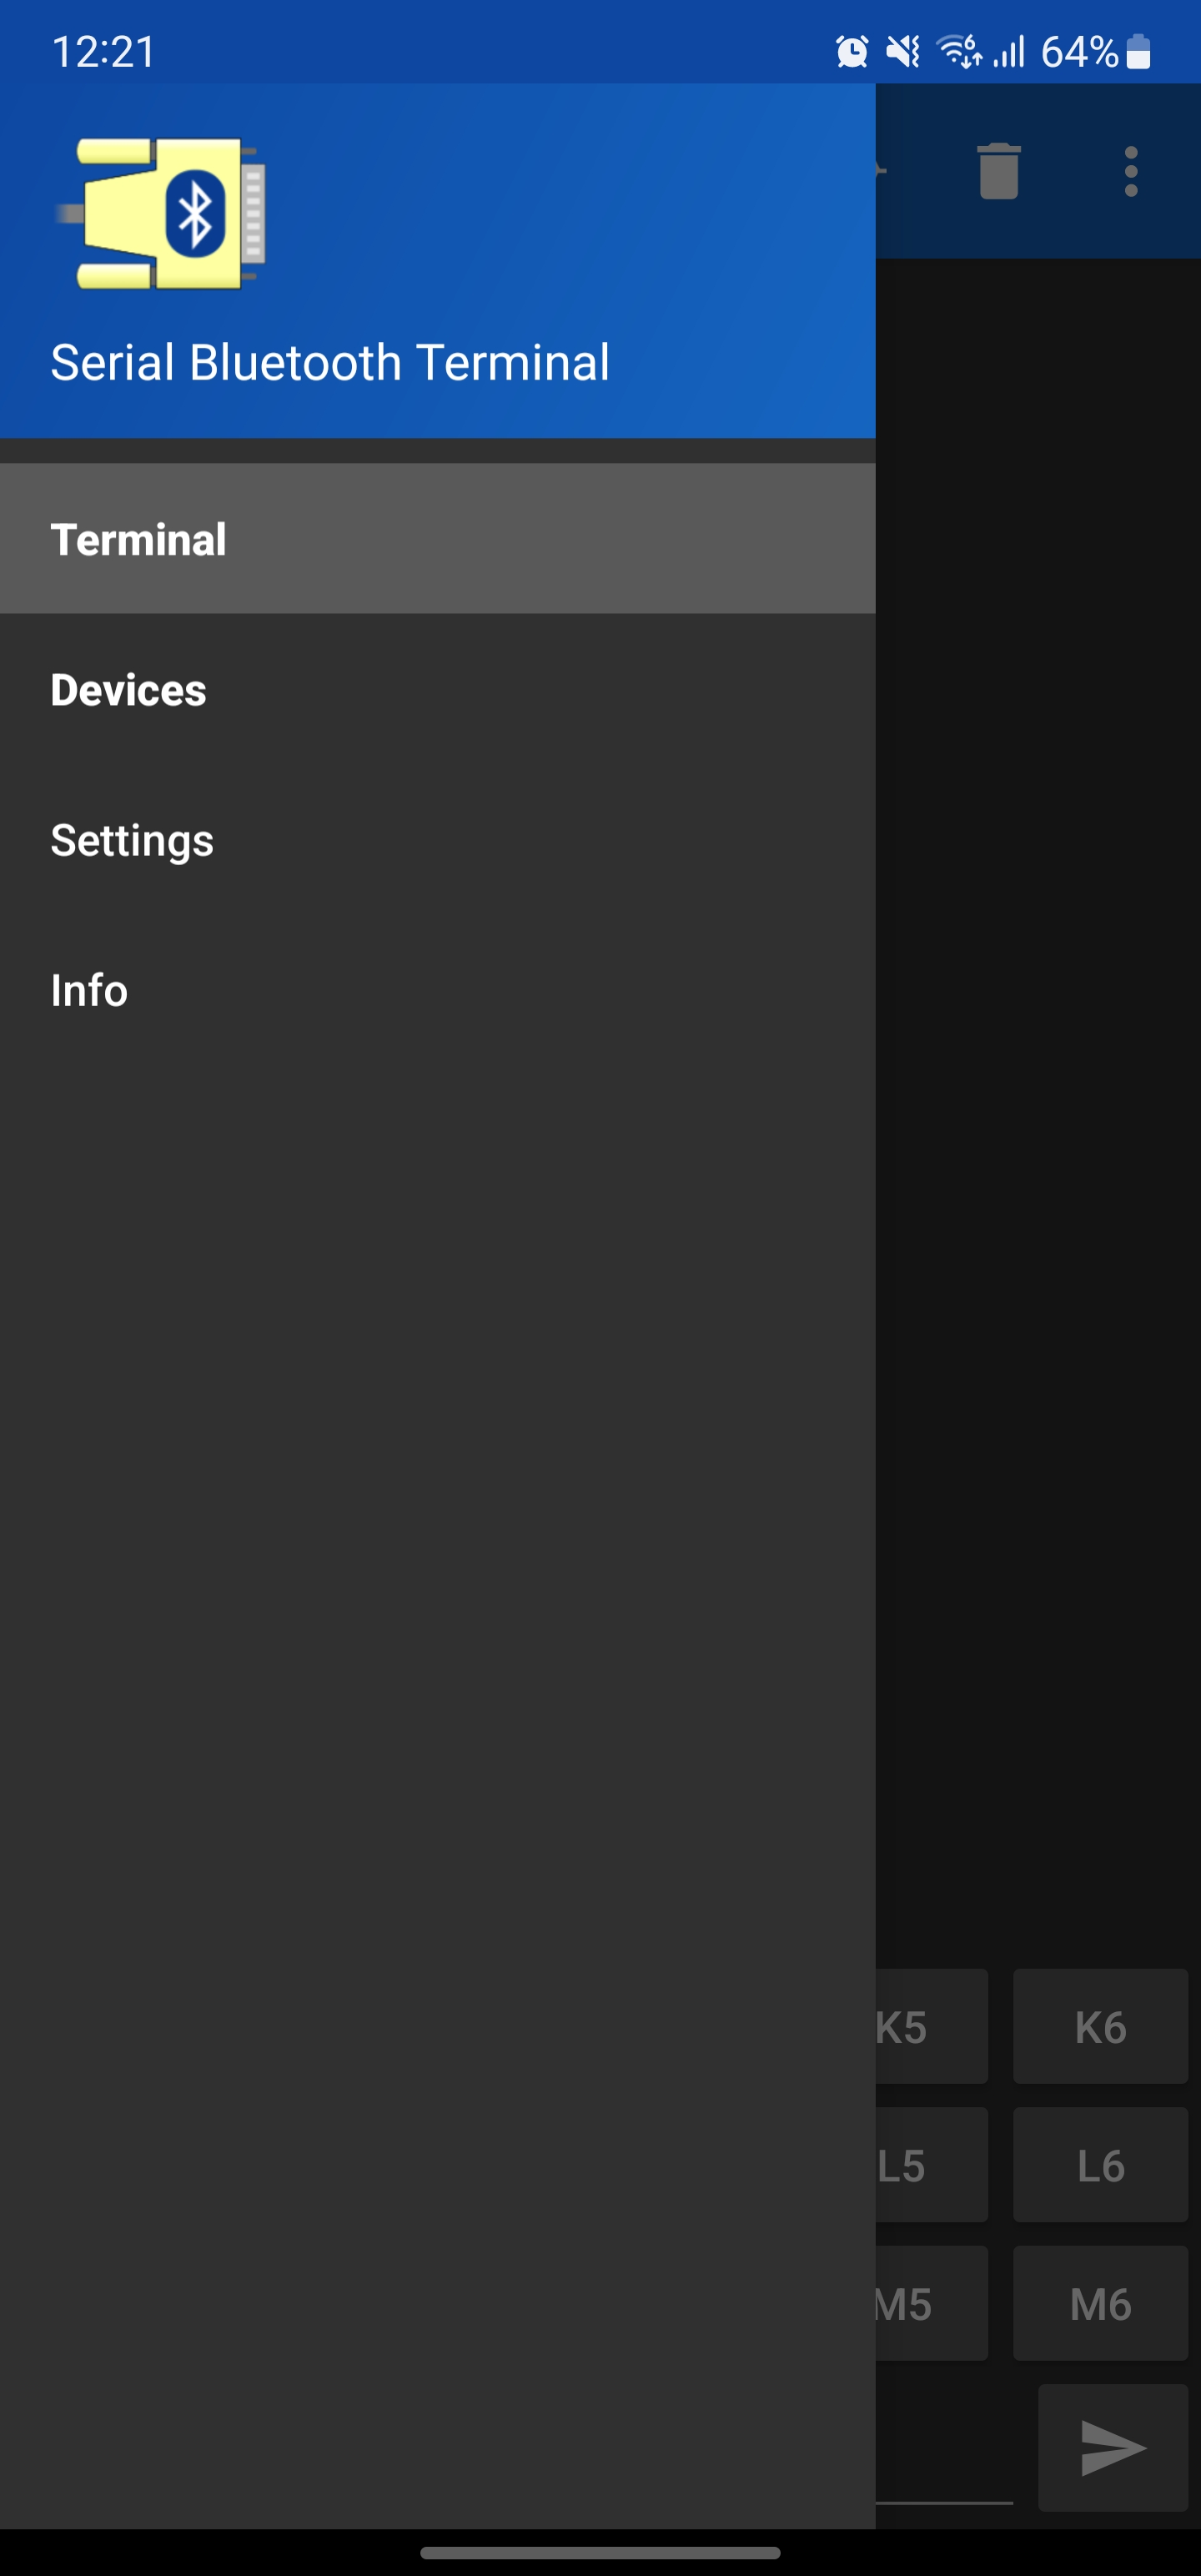

Devices에서 wonking 블루투스 잡기
settings의 Misc 에서 Macro 3 Row 로 설정


매크로키 길게 눌러서 위와 같은 배열 만들기


통신 확인 및 내장 LED 깜빡이는지 확인 할것
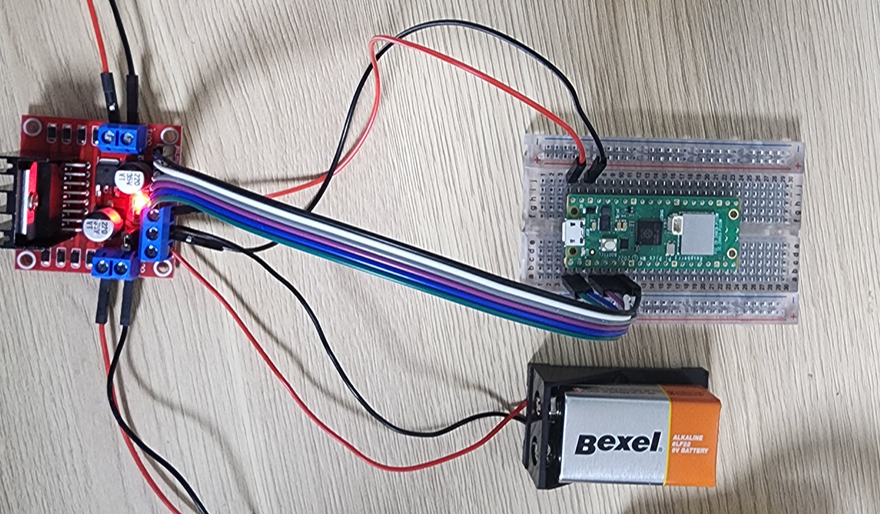
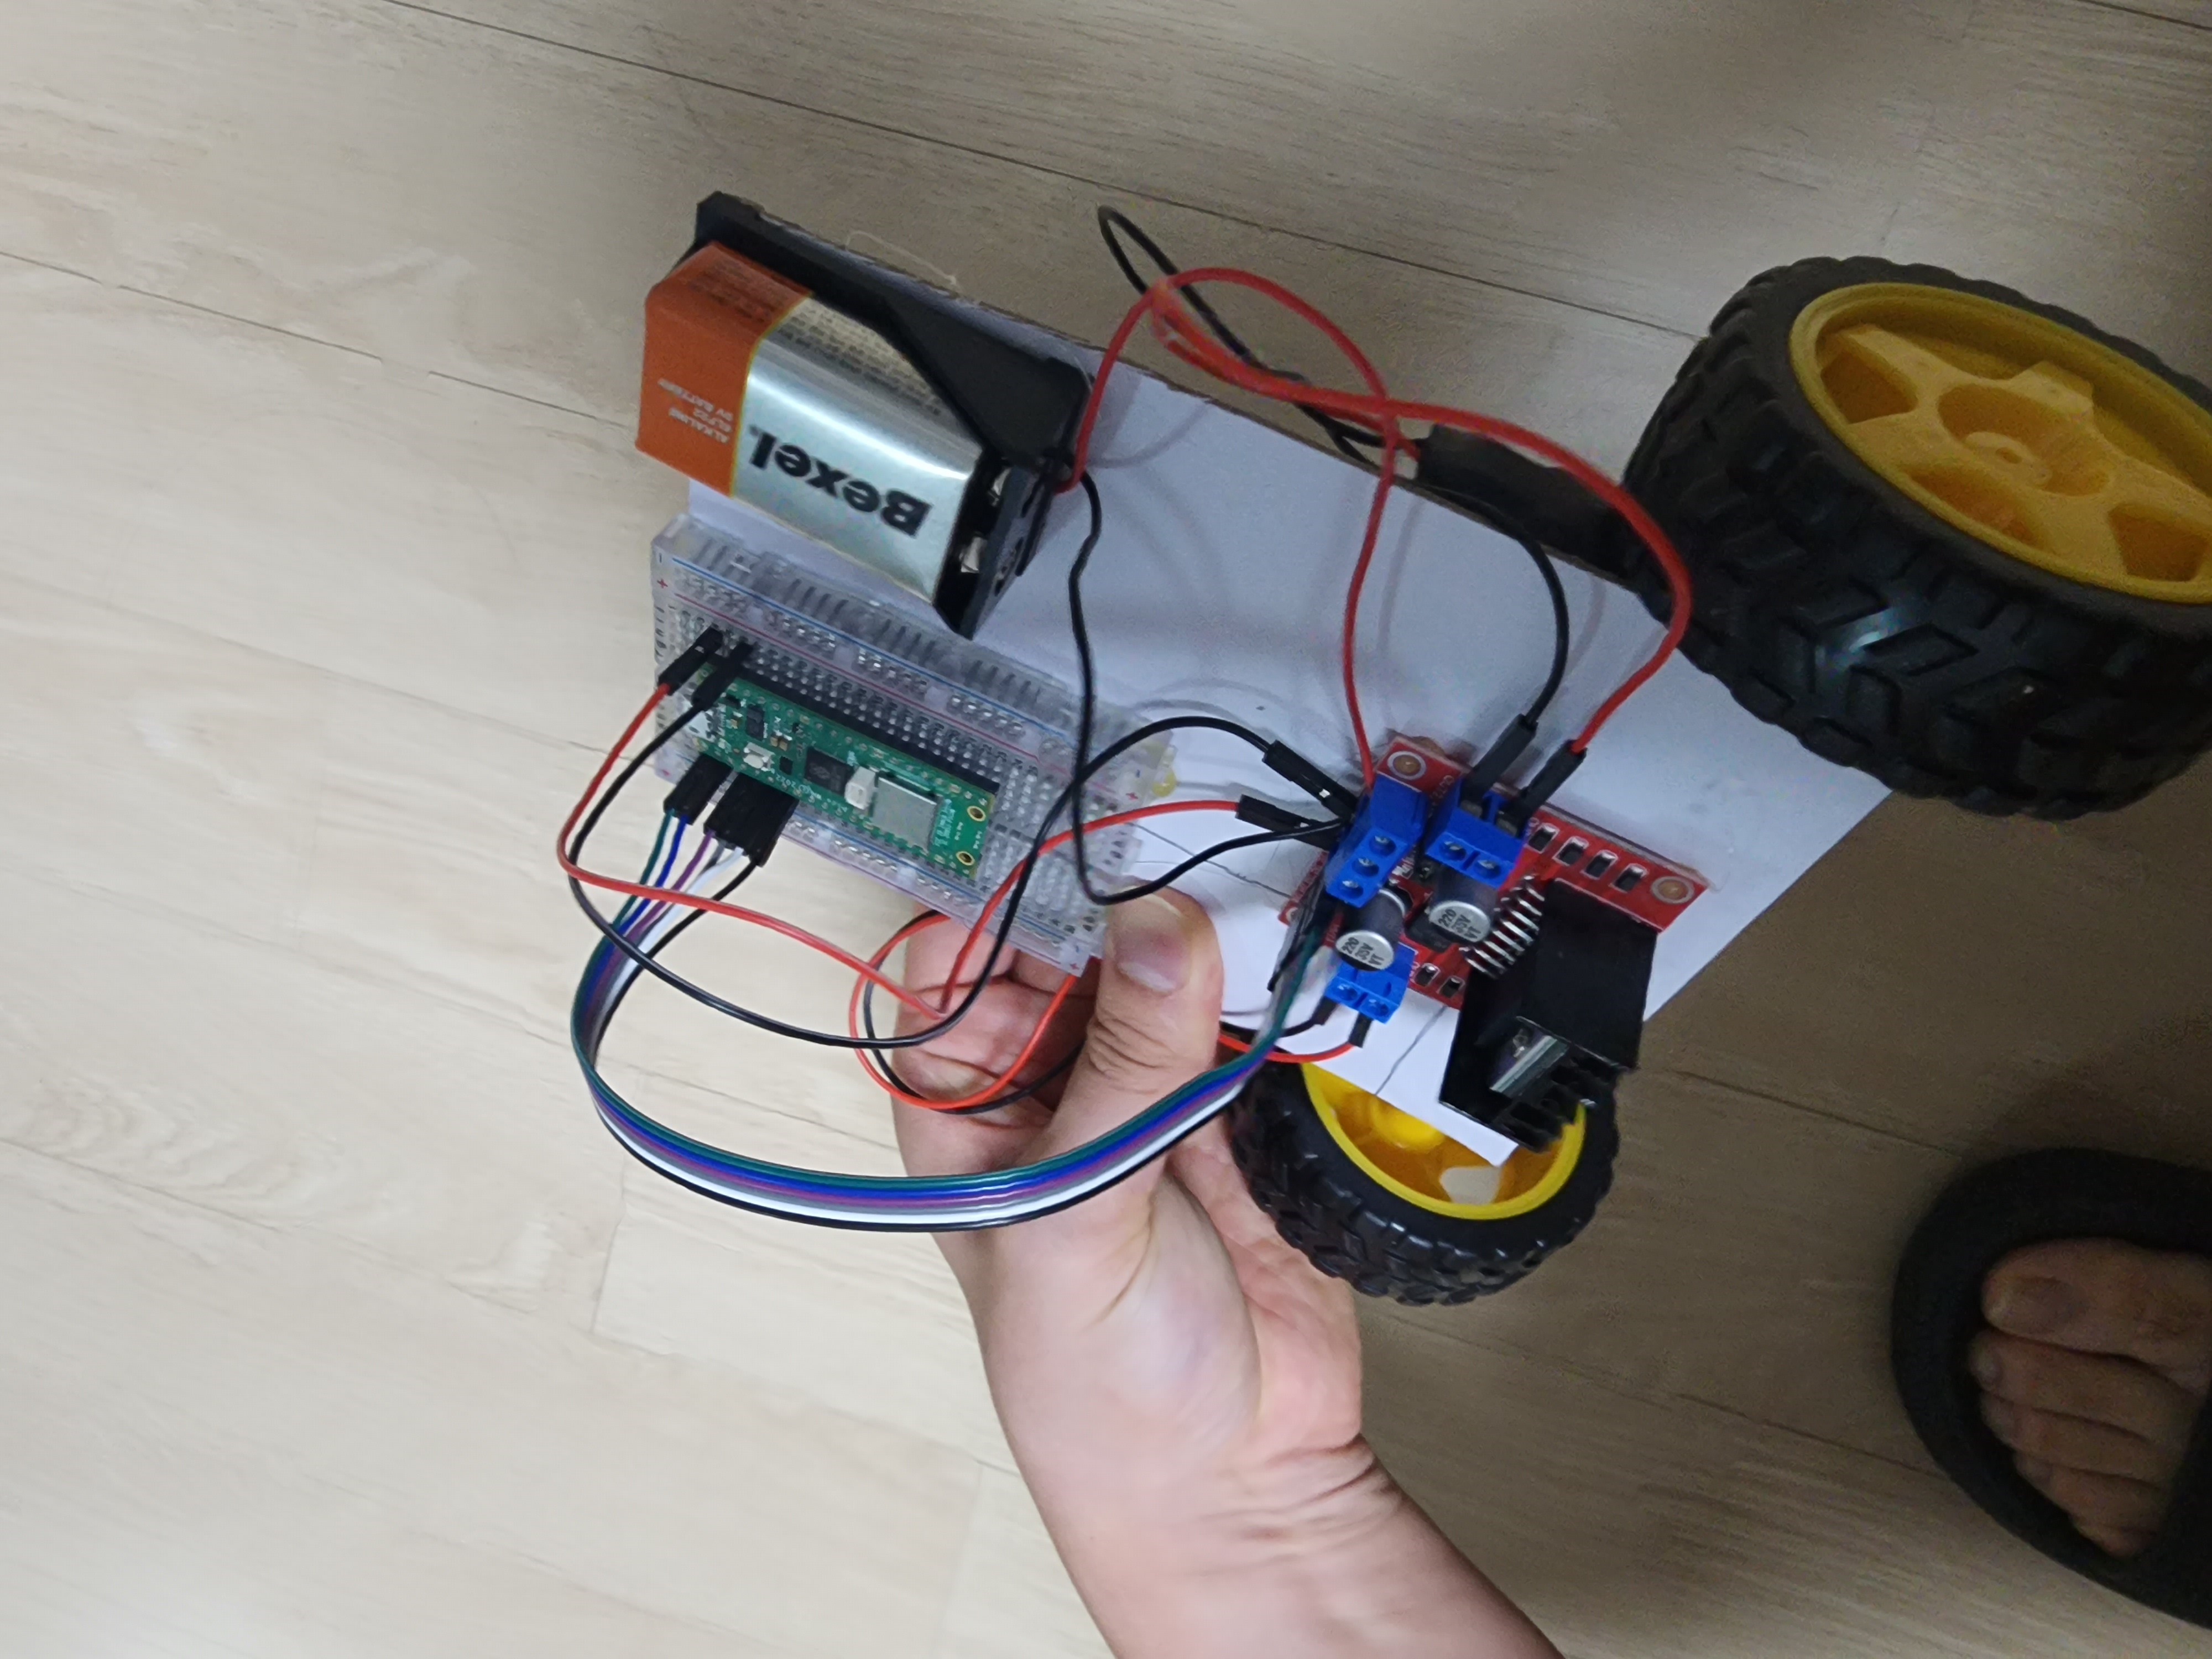
4단계. 라즈베리파이 회로 제작
핀아웃 참고
회로 연결 확인

https://microdigisoft.com/control-dc-motor-using-l298n-raspberry-pi-pico-micropython/
Control DC Motor using L298N-Raspberry Pi Pico-MicroPython | microdigisoft.com
This tutorial we will see how to control a DC motor Using L298N H-Bridge motor Driver module with Raspberry Pi Pico Board and MicroPython Programming.
microdigisoft.com
모터드라이버 L298n
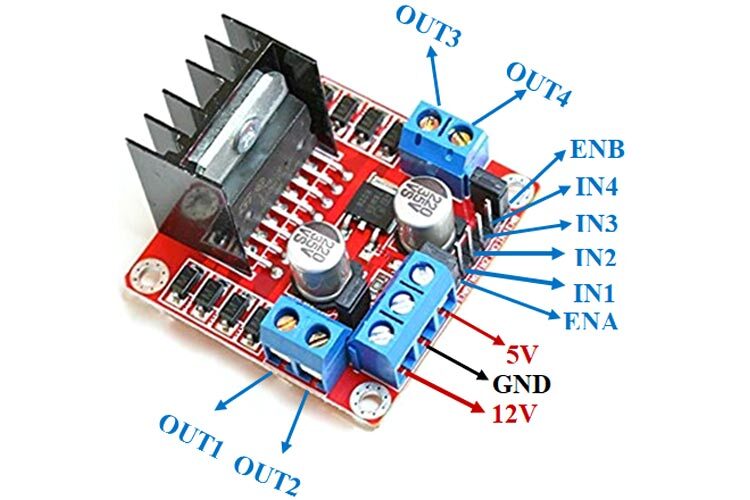
ENA -=> GP 0
IN1 => GP1
IN2 => GP2
IN3 =. GP3
IN4 => GP4
ENB => GP5
m1 = Pin(1, Pin.OUT)
m2 = Pin(2, Pin.OUT)
m3 = Pin(3, Pin.OUT)
m4 = Pin(4, Pin.OUT)
en1 = Pin(0, Pin.OUT)
en2 = Pin(5, Pin.OUT)
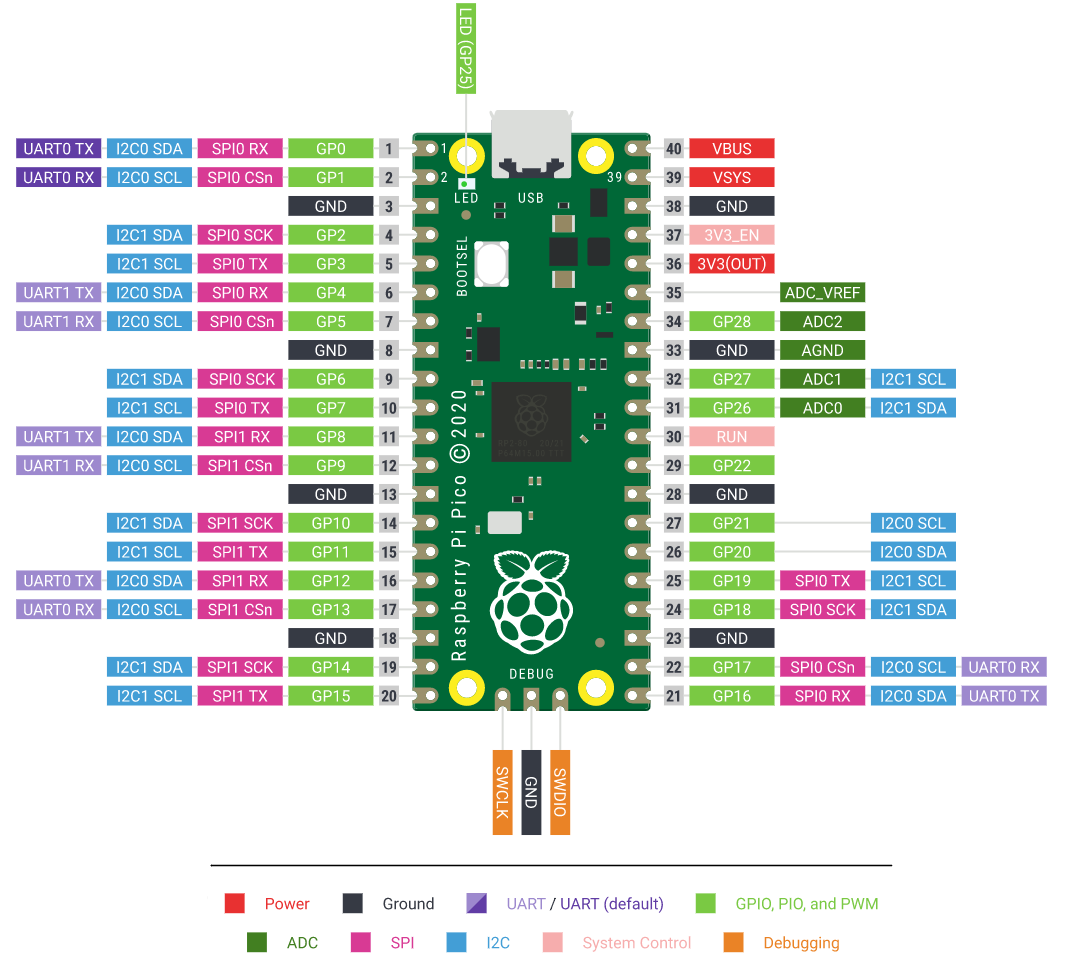
9V 배터리 -> 드라이버 12V와 gnd 연결
피코 VBUS -> 드라이버 5 V와 GND 연결
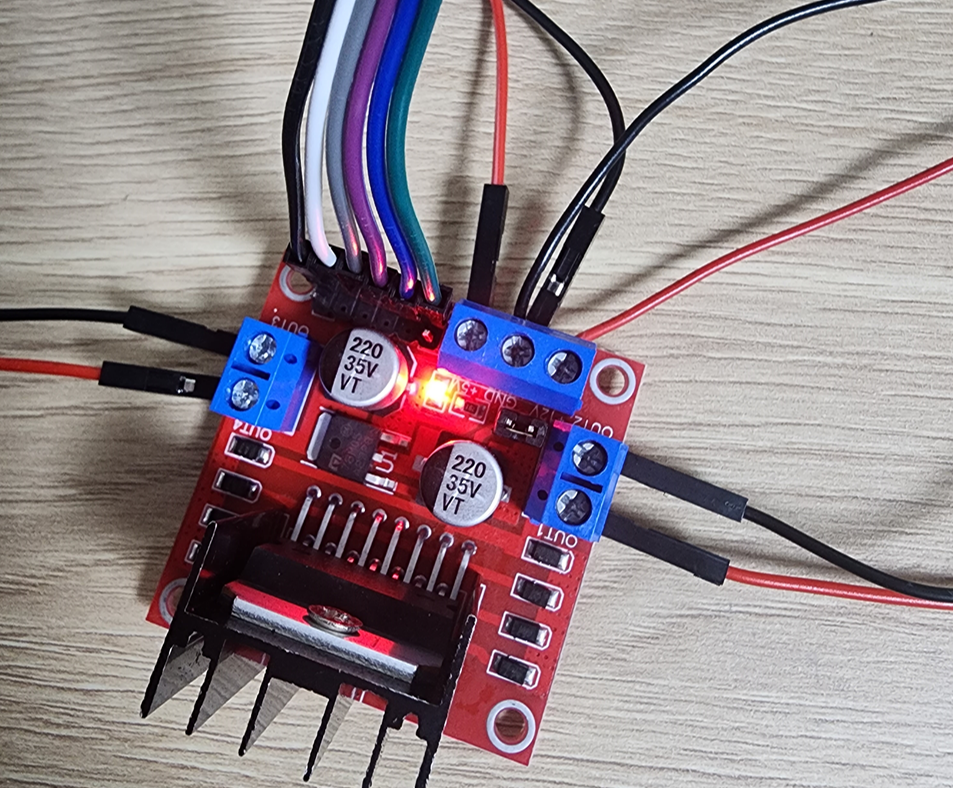
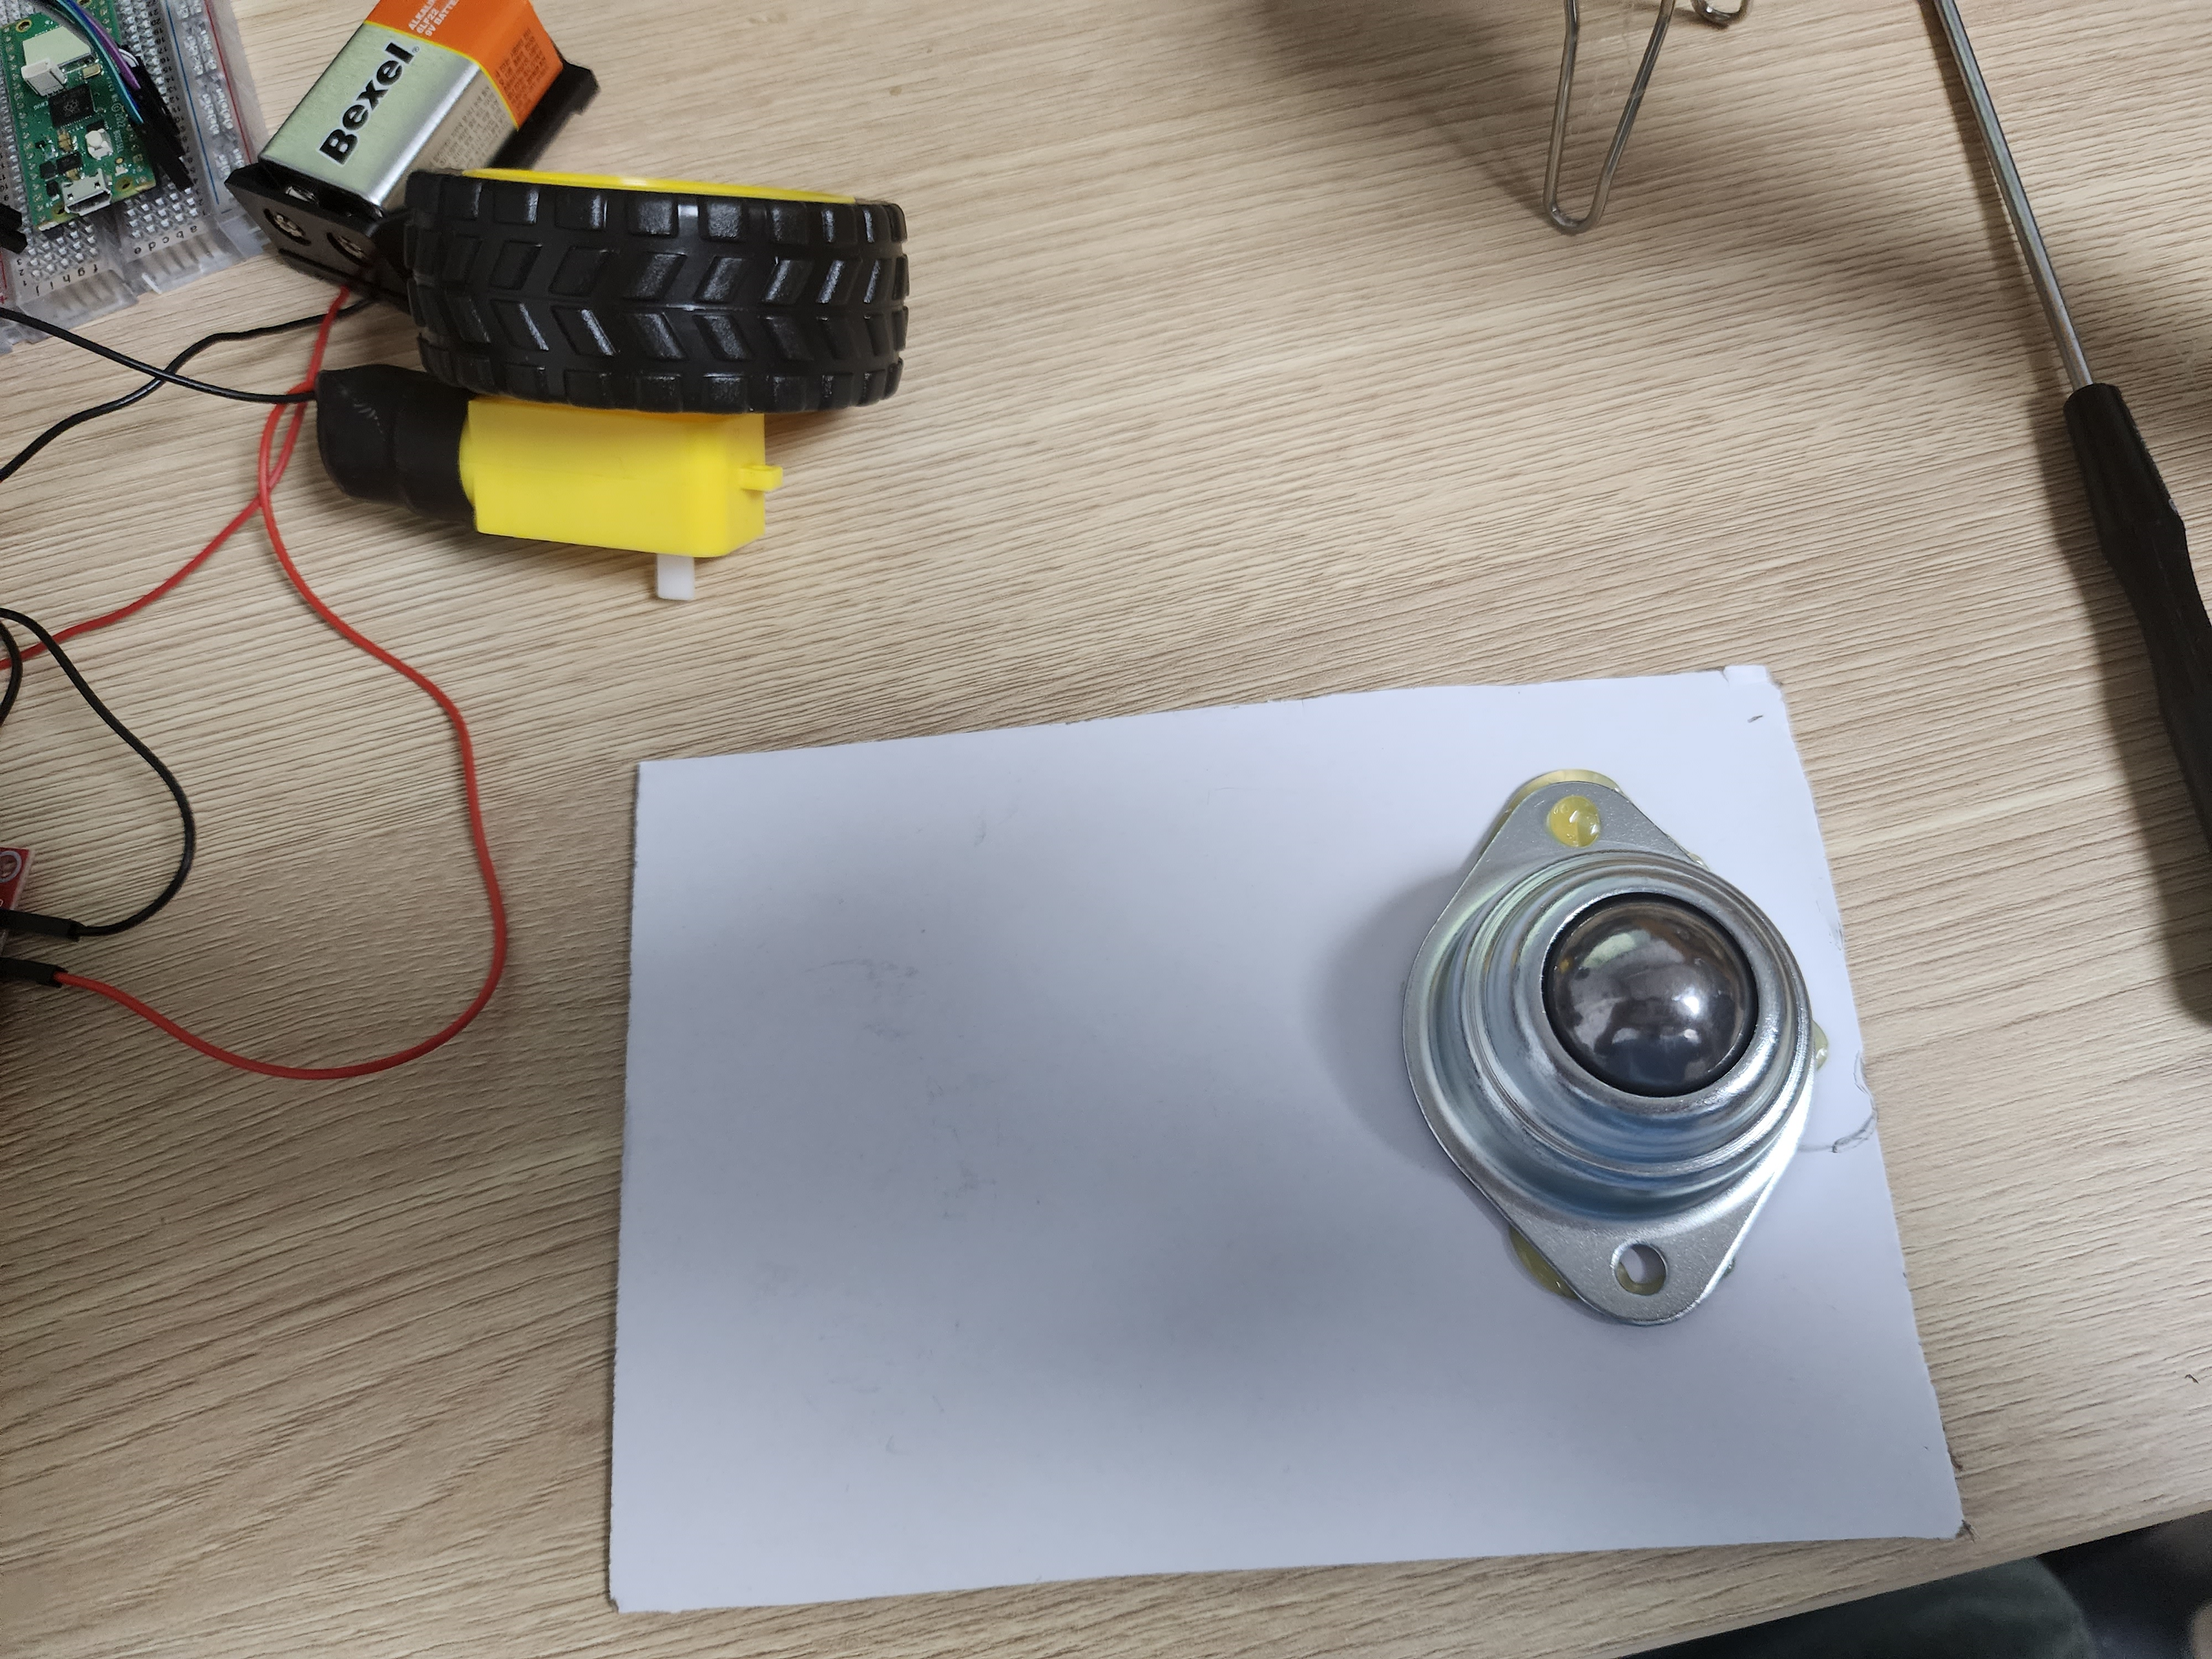
5단계. 하드웨어 제작
프로토 타입이라 간단하게 만들었다.

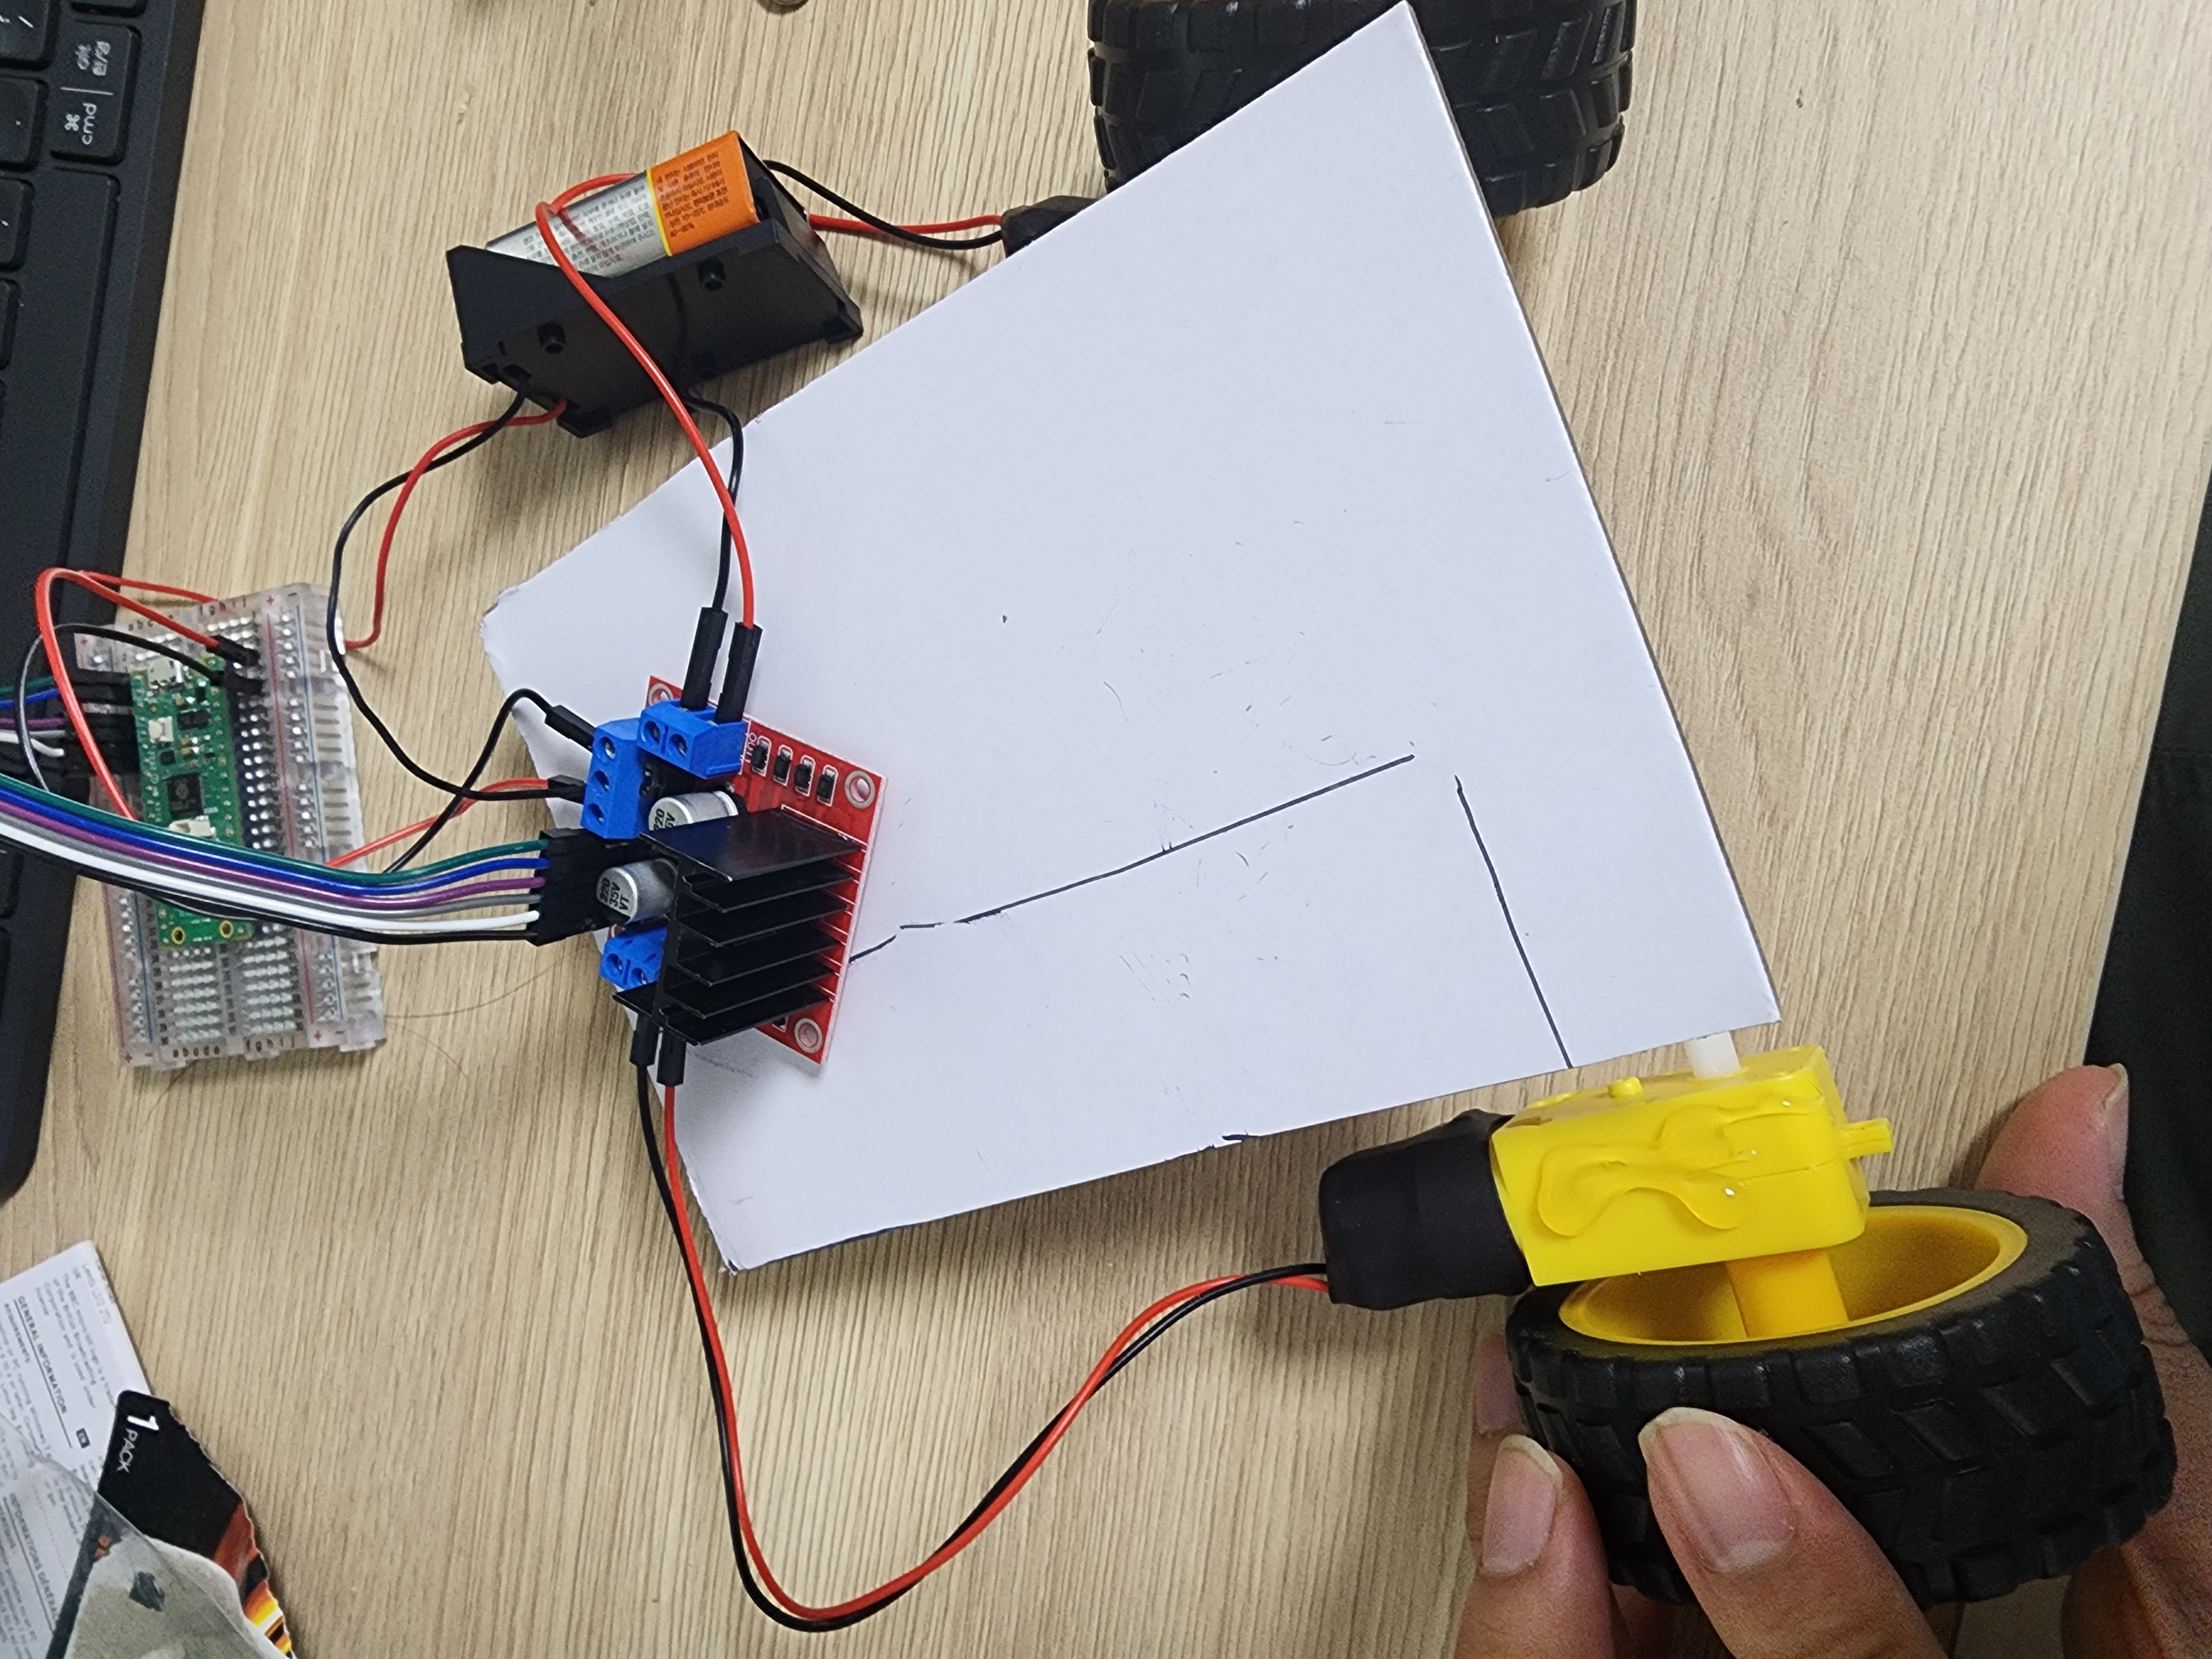

글루건도 전류 합선을 유발할 수 있으니 기판 프린트나 소켓이 없는 쪽으로 살짝만 묻혀준다.
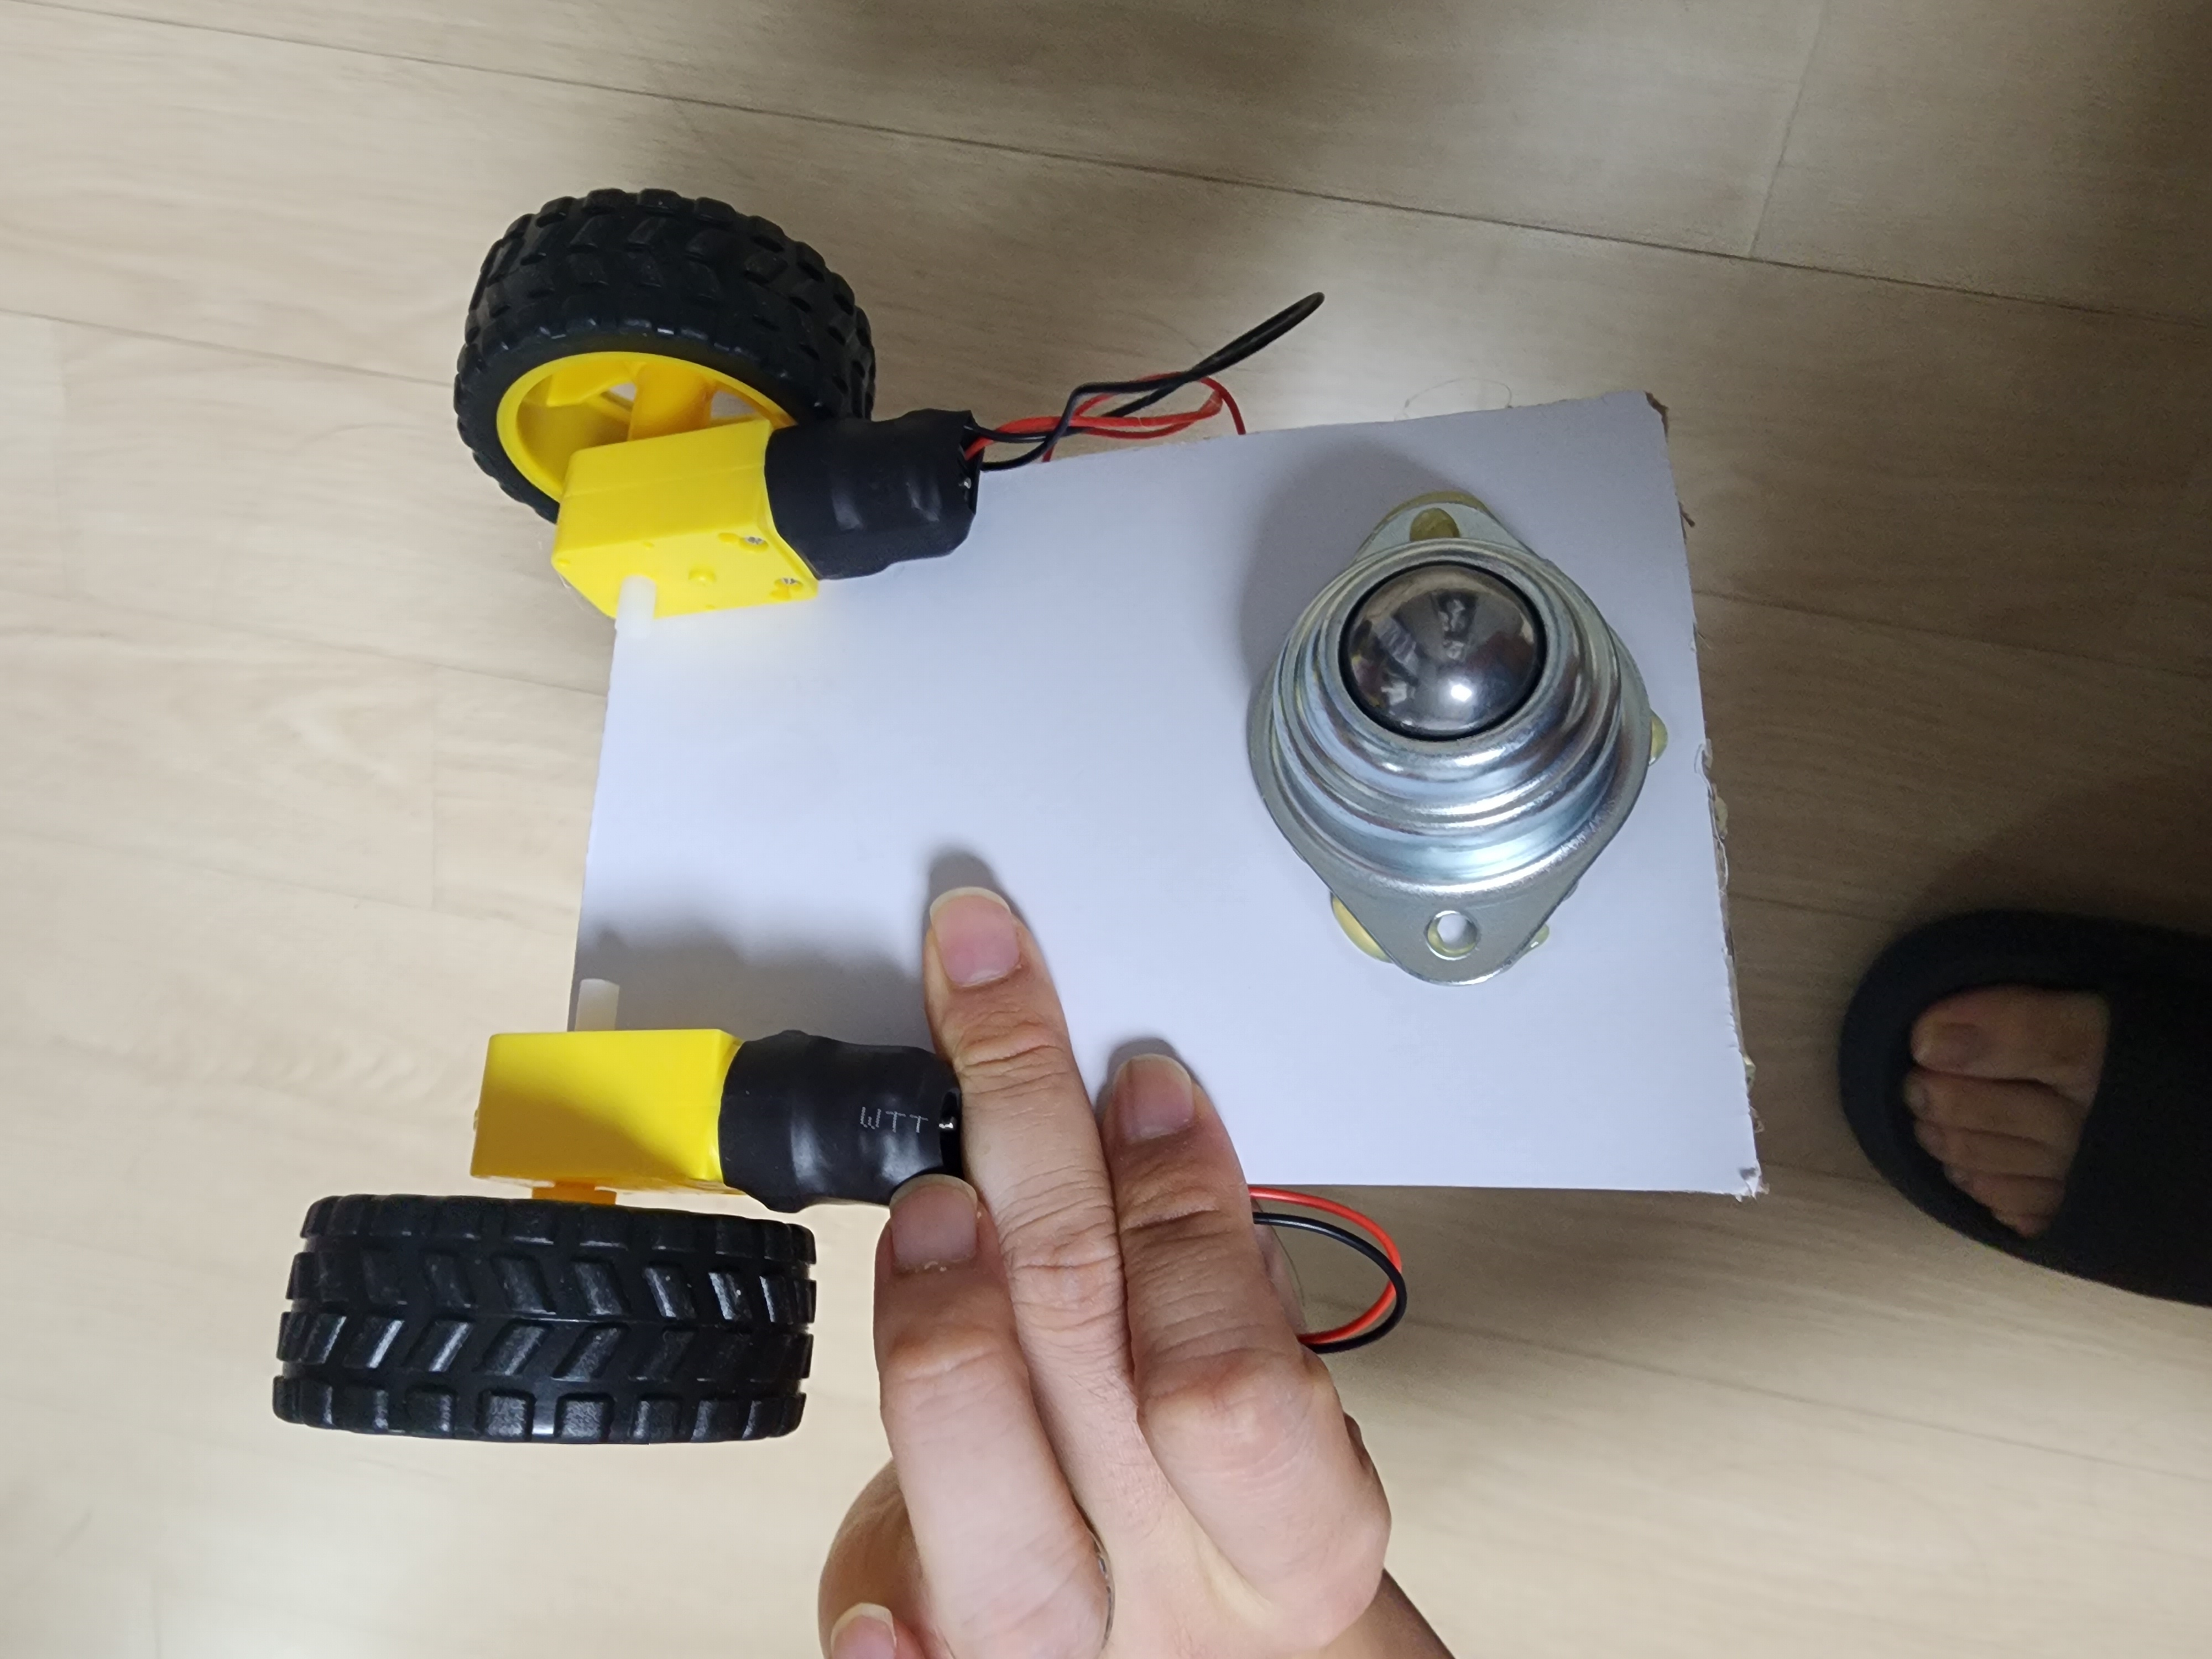
완성
끝.
@WONKINGMAKERCLASS2023
'메이커 프로젝트 > 라즈베리파이 피코' 카테고리의 다른 글
| 라즈베리파이 피코 + 음성인식 + 릴레이모듈 + 멀티탭 프로젝트 (0) | 2023.08.02 |
|---|---|
| 2023 서울시교육청 전문가연수 AI수업설계 교육과정 안내. (0) | 2023.08.01 |
| 티처블머신 AI 모델 & 라즈베리파이 피코와 연동하기(feat. RGB LED) (0) | 2023.07.31 |
| 라즈베리파이 피코 w의 LED 웹서버 제어(feat.구글 파이어베이스) (1) | 2023.07.29 |


